Fields
Overview
Experiments are represented in Field Book as fields. Fields are either imported from a file, from a BrAPI-enabled database, or created from scratch.
Each field has a unique name, an import date, and a set of entries which represent the experimental units on which data will be collected (e.g., plots, plants). Once data is collected and exported for a given field it will display the dates of last edit and export.

A sample field with a name, import/edit/export dates, and number of entries
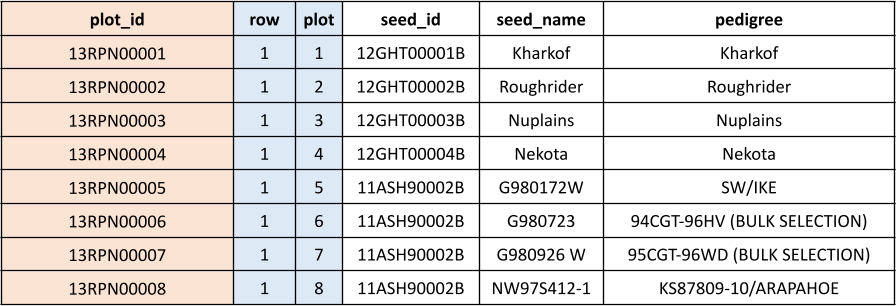
When importing from a file, each row in the file reprents an entry. Each entry within a field must have the following:
A unique identifier, which is used internally by Field Book to associate data with the specific entry. It must be unique across all of your fields.
A primary identifier, and a secondary identifier. These set the order of advancement through the field’s entries, and can be whatever makes the most sense for your experiment. Most often they are numbers from the experimental design (e.g., row/plot, row/column, range/plot).
A sample field import file
Additional information such as variety name, pedigree, or treatments is optional, but can be included and viewed in the InfoBars or in the summary dialog on the collect screen.

The Fields screen layout with sample fields loaded.
Field Book includes a set of sample field files. Samples field_sample.csv, field_sample2.csv, and field_sample3.csv represent typical wheat breeding fields, while rtk_sample.csv demonstrates the import format for entry location data (an additional geo_coordinates column). Imported entry coordinates can then be used with the  GeoNav feature.
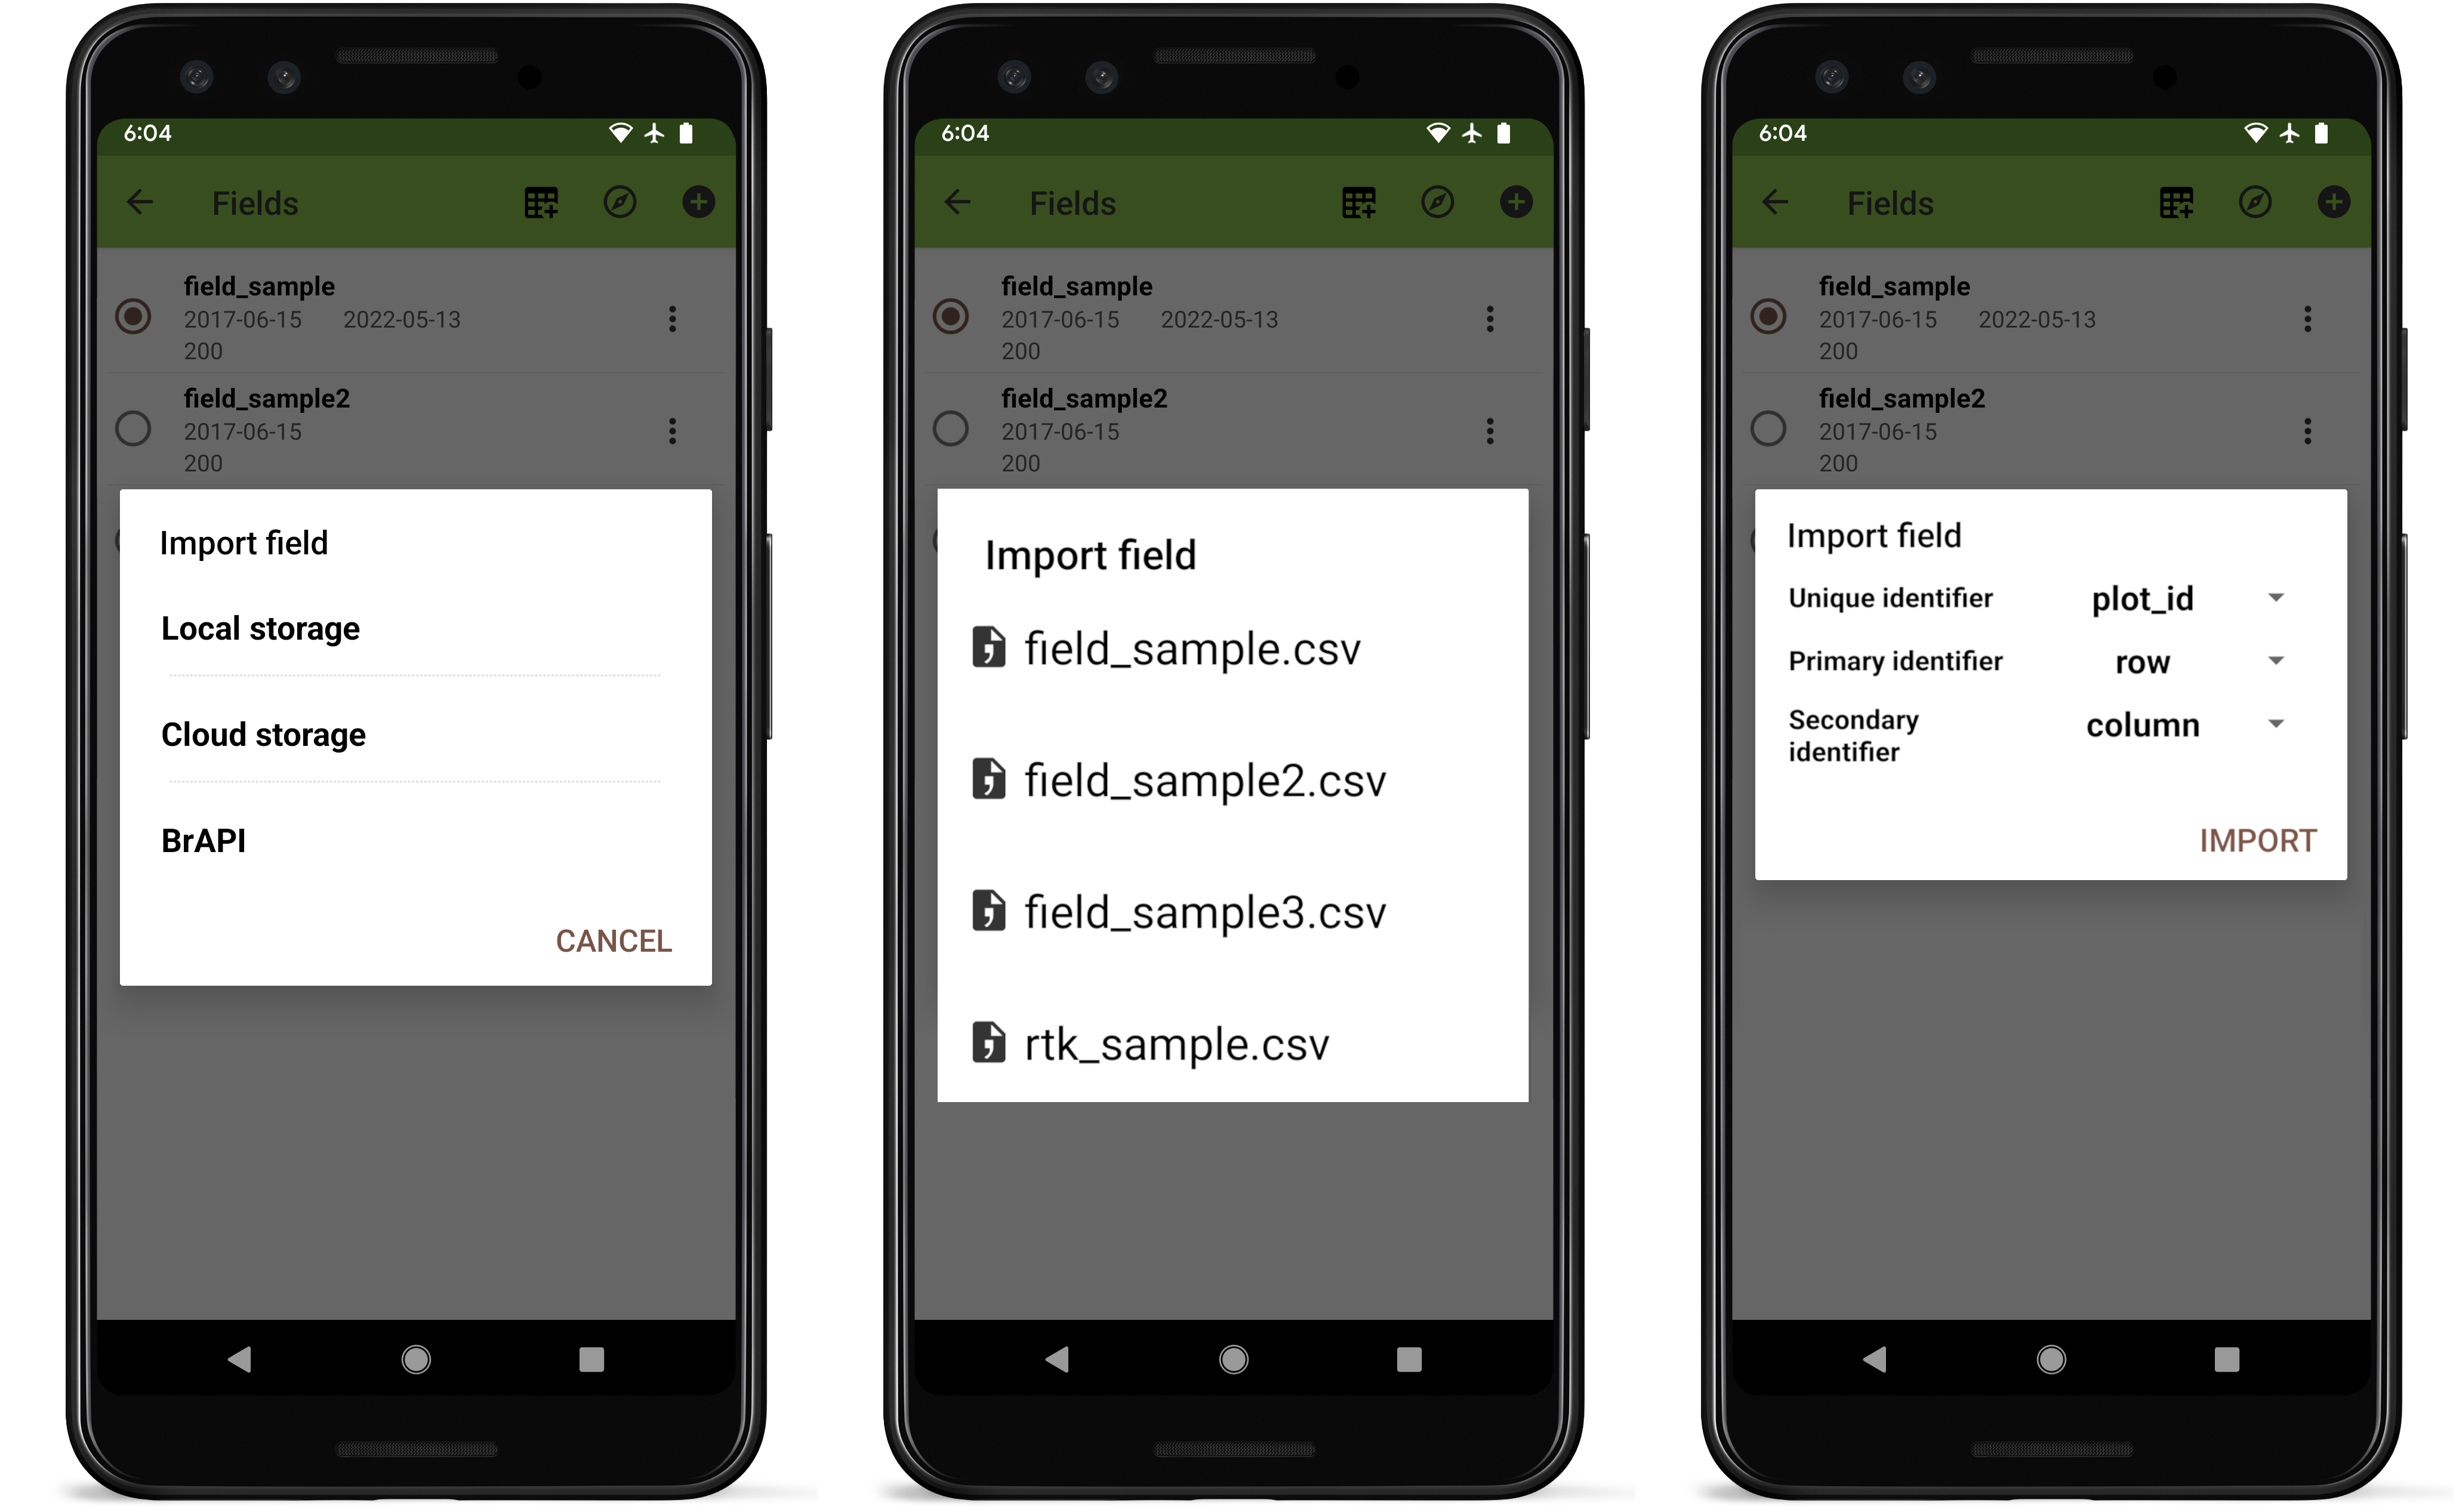
Importing a new field
To import a new field into Field Book press the  icon in the upper right-hand corner of the toolbar in the Fields section. Then, in the resulting dialog, select whether to import from a local file, from cloud storage (Dropbox, Google Drive, etc.), or via a
  BrAPI (Breeding API) connection.
A default import source can be set in  General Settings to skip this dialog.
Field import process.
Selecting local will display a list of files in the field_import directory. Only CSV, XLS, or XLSX files will appear in the import dialog. Filenames and column headers should exclude the following special characters:

Characters that are not allowed in file and column names
Files can be added to the import folder by downloading or transferring from a computer, as described in Storage.
Once a file has been selected, the dropdown menus the dropdown menus allow selection of the column names that correspond to Field Book’s required columns. Pressing IMPORT will finish importing the field.
Cloud storage
If you choose to import from cloud storage, Field Book will open the device file manager allowing navigation to the the file for import.
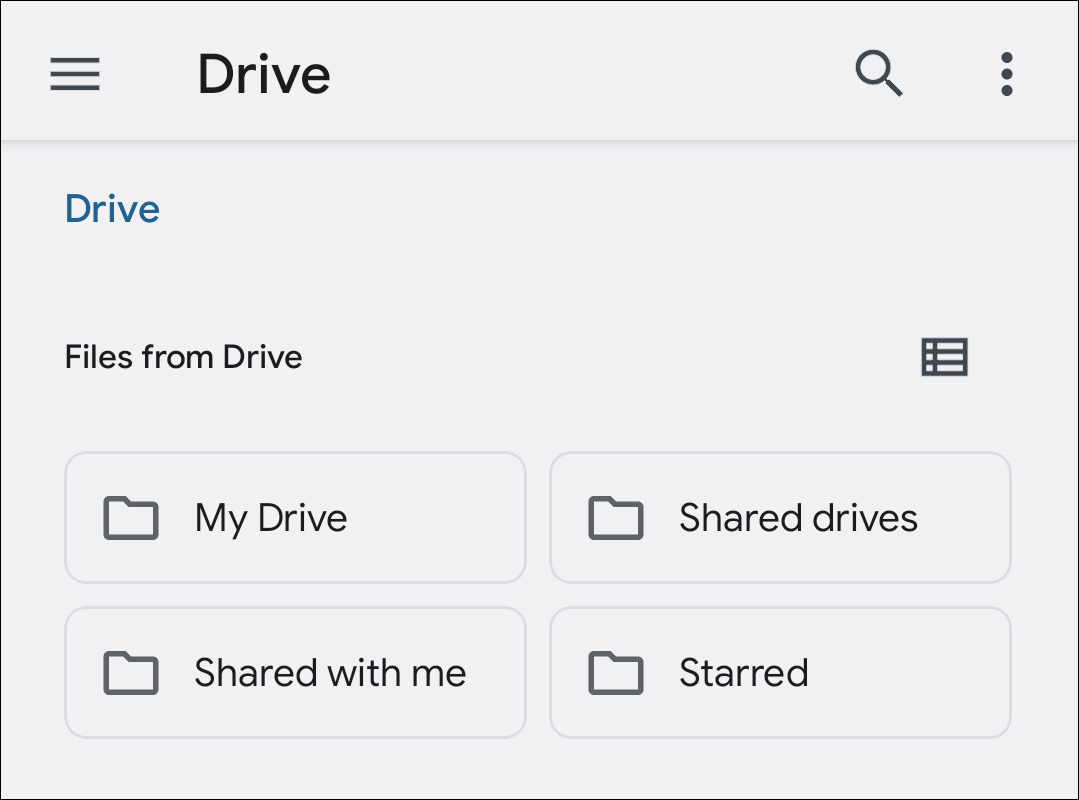
Navigating to a google drive file for cloud import
Creating a field
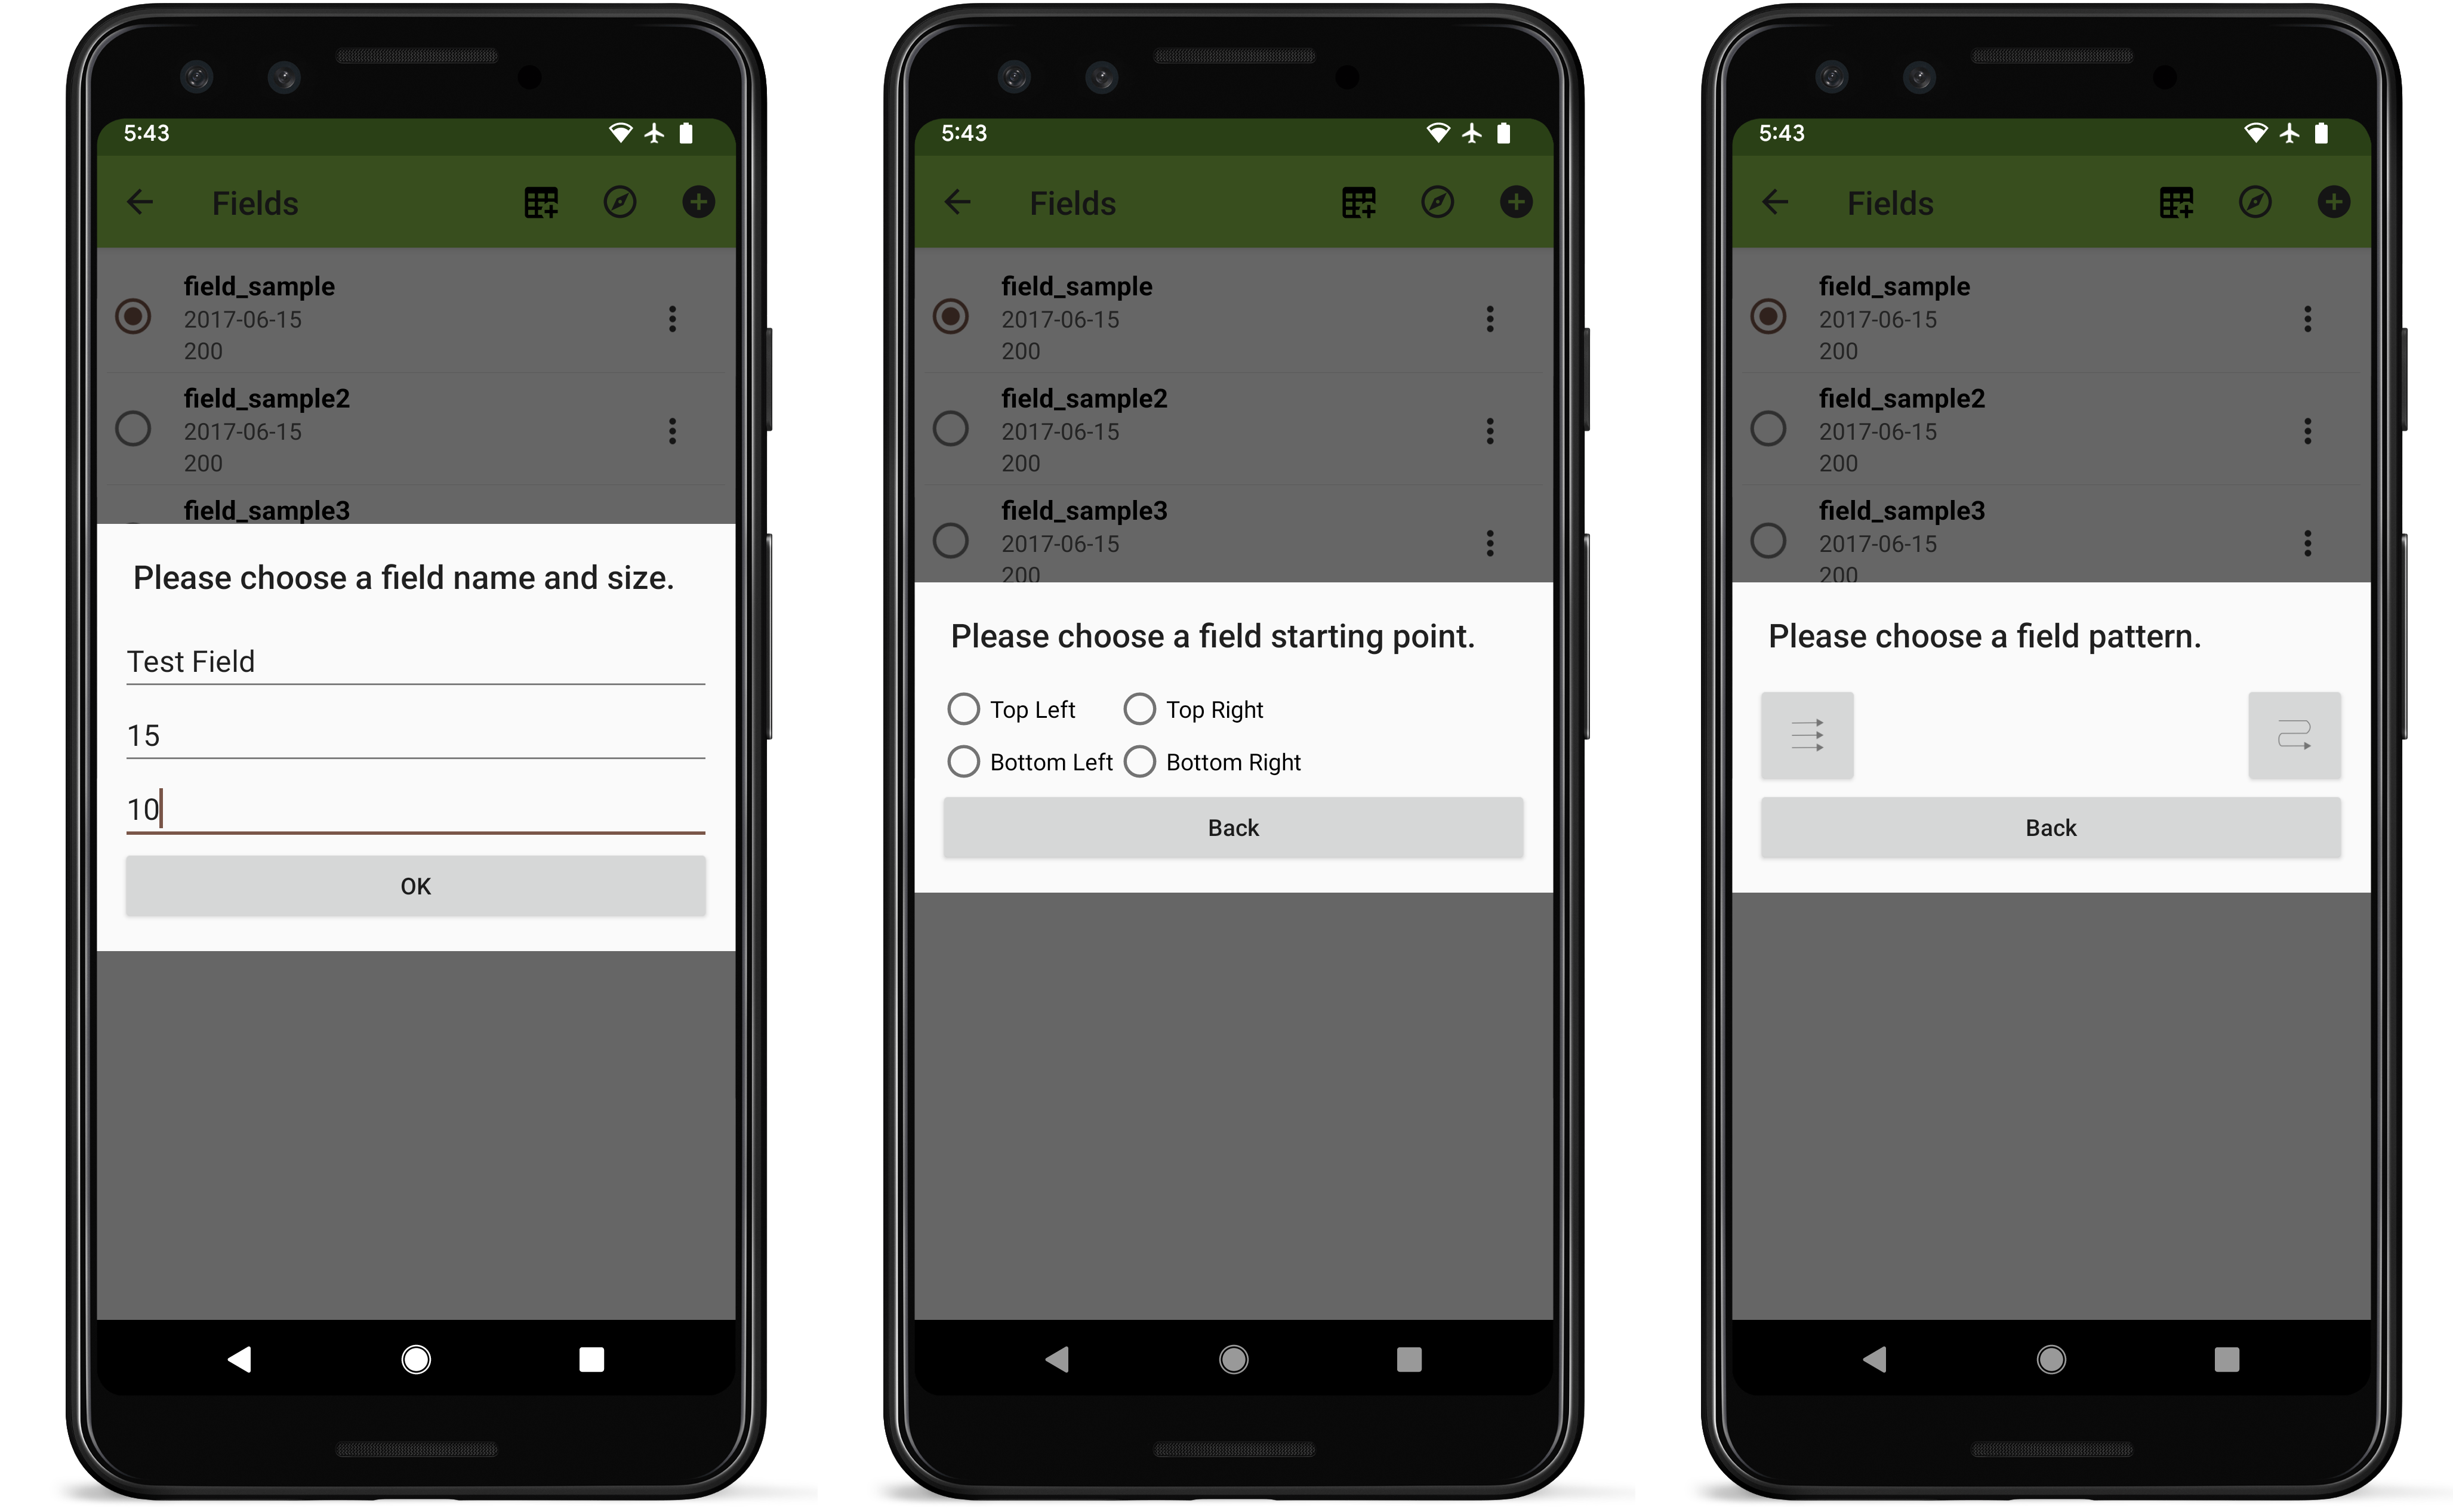
Field creation process
To create a new field directly within Field Book press the  icon on the toolbar. Set your field name and dimensions, choose which corner of the field will contain the first plot, and select zigzag or serpentine plot numbering. Unique IDs will be generated automatically.
Managing fields
To activate a field for data collection, select it from the list of fields.
Each row in the fields list displays the Date imported, Date edited, Date exported, and Number of entries.

Field management sorting steps
Pressing the  icon to the right of the trial info opens a list of options:
Sort provides a dialog to update the plot ordering. Populate the sort menu by pressing the
icon, and selecting from the list of imported columns. Once columns have been added, change their relative priority by using the
icon to drag and reorder them. Press the
icon to toggle the sort between ascending and descending. Press the
icon to remove a column.
Sync connects to the server specified in
Delete removes the trial and all associated data. A confirmation message will be shown first, to confirm that deletion is not triggered accidentally.